
Flooring options from the 1950s and 60s were practical, stylish, and full of character, making them an excellent choice for homeowners today who want to restore or recreate a vintage vibe. If you’re looking to bring that timeless mid-century feel to your kitchen, you’re in the right place. In this guide, we’ll walk you through the most popular flooring choices from the mid-century era that are still available today, where to buy them, their characteristics, pros and cons, and how to install each.
Types of MidCentury Floors
Midcentury homes commonly featured materials that were affordable, durable, and easy to clean. Some of these options have evolved but remain available today:
Linoleum Flooring
Characteristics: Linoleum was a staple in midcentury homes, valued for its durability and bright patterns. It’s made from natural materials like linseed oil, wood flour, and cork, making it ecofriendly.
Pros: Sustainable, longlasting, and naturally resistant to bacteria.
Cons: Requires regular sealing and may stain if not properly maintained.
Where to Buy: Check out companies like Forbo Marmoleum, which offers classic linoleum options in vibrant colours and retro designs, ideal for recreating a midcentury kitchen.
Installation: Linoleum comes in sheets or tiles. For DIYers, tiles are easier to manage, while sheets typically require professional installation due to precision cutting and adhesive application.
Vinyl Flooring
Characteristics: Vinyl flooring, introduced in the late 1940s, gained popularity in the 1950s and 60s. It offered a cost-effective alternative to linoleum with a wider range of bold patterns and colours.
Types Available:
- Sheet Vinyl: Perfect for seamless, water-resistant flooring.
- Vinyl Tile: Ideal for achieving checkerboard or geometric patterns.
- Luxury Vinyl Tile (LVT): Mimics wood, stone, or ceramic with modern durability.
Pros: Affordable, easy to clean, and water resistant.
Cons: Lower-quality options may wear out faster and are less ecofriendly.
Where to Buy: Companies like Armstrong Flooring and Tarkett offer sheet vinyl and LVT in midcentury-inspired designs.
Installation:
- Sheet vinyl requires careful handling and professional installation.
- Vinyl tiles, especially peel-and-stick, are DIY-friendly and perfect for creating checkerboard patterns or retro mosaics.
Ceramic Tile
Characteristics: Ceramic tile was a popular choice for midcentury kitchens, particularly in pastel colours like pink, turquoise, and mint green.
Pros: Highly durable, water resistant, and available in a wide variety of colours and patterns.
Cons: Cold underfoot and harder to install compared to other options.
Where to Buy: Olympia Tile and Mosaic offers a wide selection of ceramic tiles that mimic midcentury styles.
Installation: Ceramic tiles require precise cutting, mortar, and grout, making professional installation the best option for large areas.
Terrazzo Flooring
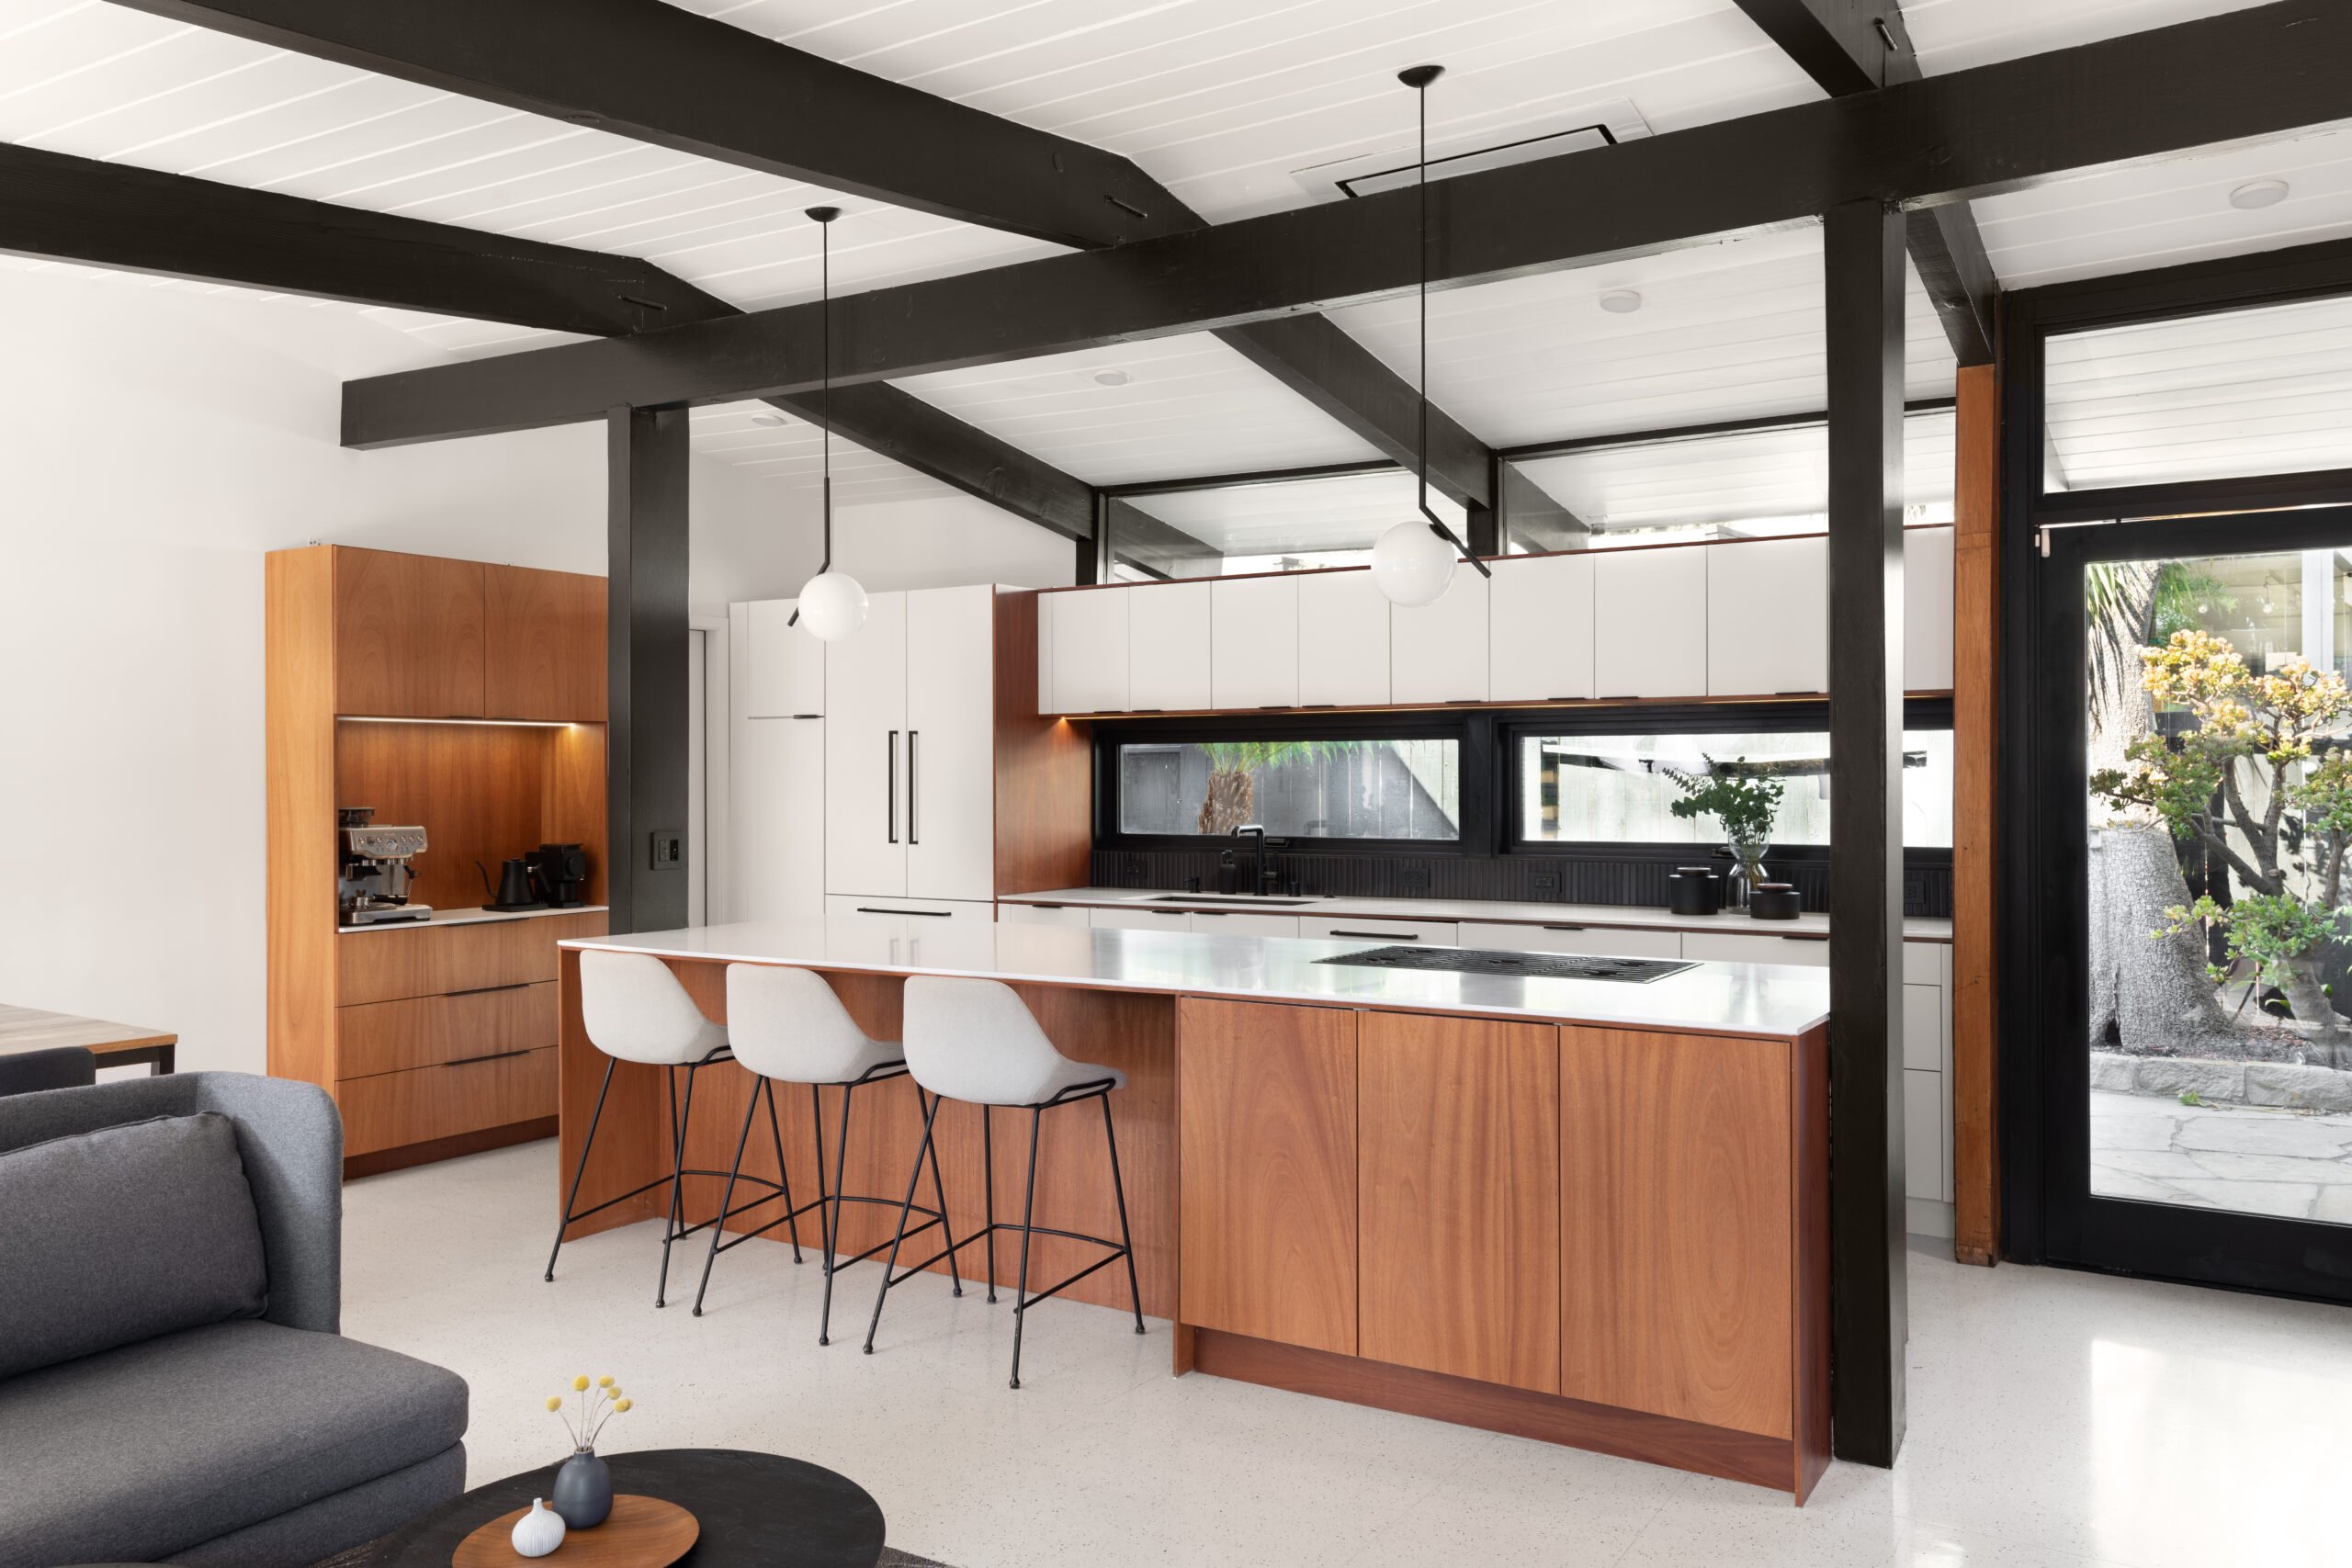
Characteristics: Terrazzo, made from chips of marble, quartz, or granite set in concrete, was used in upscale midcentury homes. Its speckled look is both elegant and durable.
Pros: Extremely durable, unique appearance, and low maintenance.
Cons: Expensive and challenging to install.
Where to Buy: Lonseal offers terrazzo-look vinyl sheets for an affordable alternative, while specialty terrazzo suppliers cater to those seeking authentic materials.
Installation: Authentic terrazzo requires professional installation, but terrazzo-look vinyl can be installed more easily as sheets or tiles.
Cork Flooring
Characteristics: Cork flooring gained popularity for its warmth underfoot and sound absorbing qualities. It was often used in kitchens where comfort was a priority.
Pros: Comfortable, ecofriendly, and naturally resistant to mould.
Cons: Prone to scratching and water damage without proper sealing.
Where to Buy: Companies like Armstrong Flooring and IVC offer corklook vinyl, which combines the aesthetic with modern durability.
Installation: Cork tiles are relatively easy to install using adhesive, but they must be sealed after installation to protect against moisture.
Choosing the Right Floor for Your Kitchen
For a Bold Retro Look: Go for vinyl tile in a checkerboard pattern (e.g., black and white or pastel tones) to channel the 1950s diner aesthetic.
For a Sleek, High-End Finish: Opt for terrazzo or terrazzo-look vinyl to create a polished, sophisticated kitchen.
For a Sustainable Choice: Choose linoleum or cork for an ecofriendly and authentic midcentury look.
For a Classic Pastel Vibe: Install ceramic tiles in soft colours like mint green or pink, paired with matching backsplash tiles.
Where to Buy Mid-Century Inspired Flooring
American Biltrite: Offers luxury vinyl tiles that replicate vintage designs.
Armstrong Flooring: Provides both vinyl sheet and tile options in retroinspired patterns.
Tarkett (Azrock): A reliable source for vinyl tiles and sheets with midcentury patterns.
Congoleum: Specialises in durable sheet vinyl for kitchens.
Harvey Maria: Perfect for luxury vinyl tiles with bold, retro designs.
Karndean: Features high-quality vinyl planks and tiles with authentic midcentury styles.
Lonseal: Provides terrazzolook vinyl sheets for a unique, upscale feel.
Mannington: Offers both traditional and modern takes on midcentury flooring with sheet and tile options.
Tips for Installation
DIY-Friendly Options: Vinyl tiles (peel-and-stick), linoleum tiles, and cork tiles are great for homeowners looking to save on installation costs.
Leave it to the Pros: Sheet vinyl, ceramic tiles, and terrazzo require precise installation, so it’s best to hire experienced professionals.
Preparation is Key: Ensure the subfloor is clean, smooth, and level before installing any flooring material to avoid issues down the line.
Tools Needed
If you’re planning to install the floor yourself, having the right tools is essential. We made a list of commonly needed tools for installing the flooring types we’ve discussed:
- Measuring Tape – To measure the dimensions of your space accurately.
- Utility Knife – For cutting vinyl sheets, tiles, or linoleum with precision.
- Chalk Line – To mark straight, even lines for proper tile alignment.
- Notched Trowel – For spreading adhesive evenly on the subfloor.
- Roller – To press vinyl or linoleum flooring into the adhesive and ensure a smooth surface.
- Floor Scraper – For removing old flooring or smoothing out the subfloor.
- Level – To ensure the subfloor is even, preventing lumps or bumps.
- Knee Pads – To protect your knees while working on the floor for extended periods.
- Adhesive or Double-Sided Tape – Depending on the flooring type, you’ll need either adhesive for glue-down installations or tape for peel-and-stick tiles.
- Tile Spacers – If installing ceramic or vinyl tiles, spacers help maintain consistent gaps for grout.
- Rubber Mallet – To gently tap tiles or planks into place without damaging them.
- Straight Edge or Ruler – For precise cutting and marking.
- Grout Float and Sponge – If you’re installing ceramic tiles, these will help with grout application and cleanup.
Photo by Joe Fletcher